
Cricut’s Infusible Ink Transfer Sheets on Blank Ceramic Coasters Tutorial
This is a sponsored conversation written by me on behalf of Cricut. The opinions and text are all mine.
In my last post, I shared a simple vinyl project using the Cricut Explore Air 2. This time we’ll go a bit further and use both the Cricut Explore Air 2 and EasyPress 2.
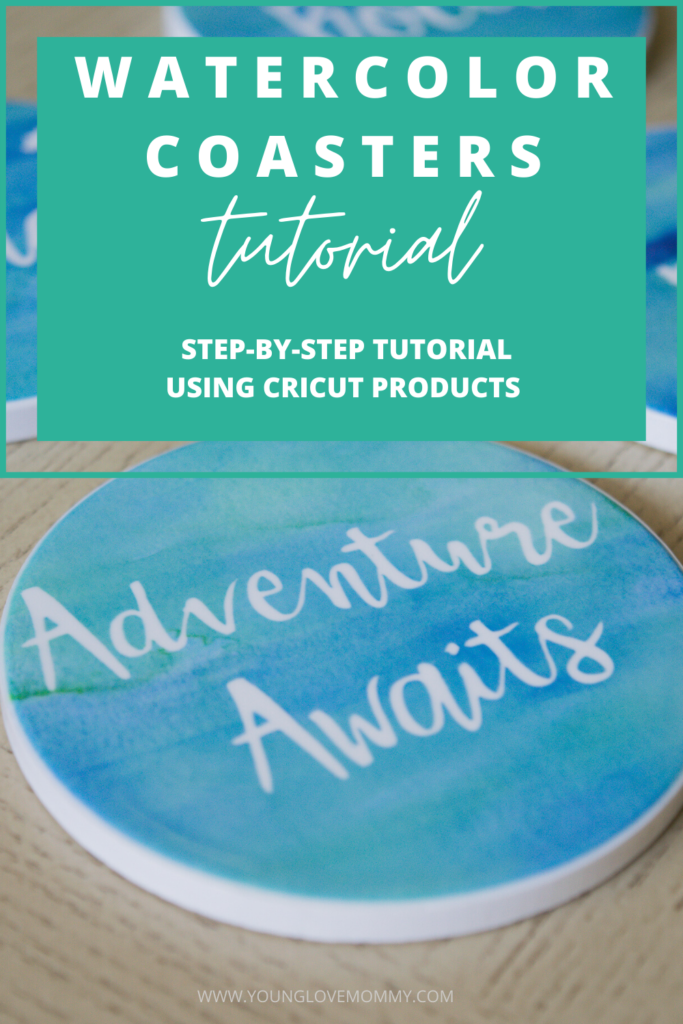
First off, I was so impressed with how well these watercolor coasters turned out.
My design reflects the cities my husband, son and I were born in! Such a fun idea for these coasters!
Below I’ll explain further how you can achieve the same look using Cricut’s infusible ink transfer sheets and the EasyPress 2.
Using the Cricut EasyPress 2 was super simple, designing exactly what I wanted was the time-consuming part.
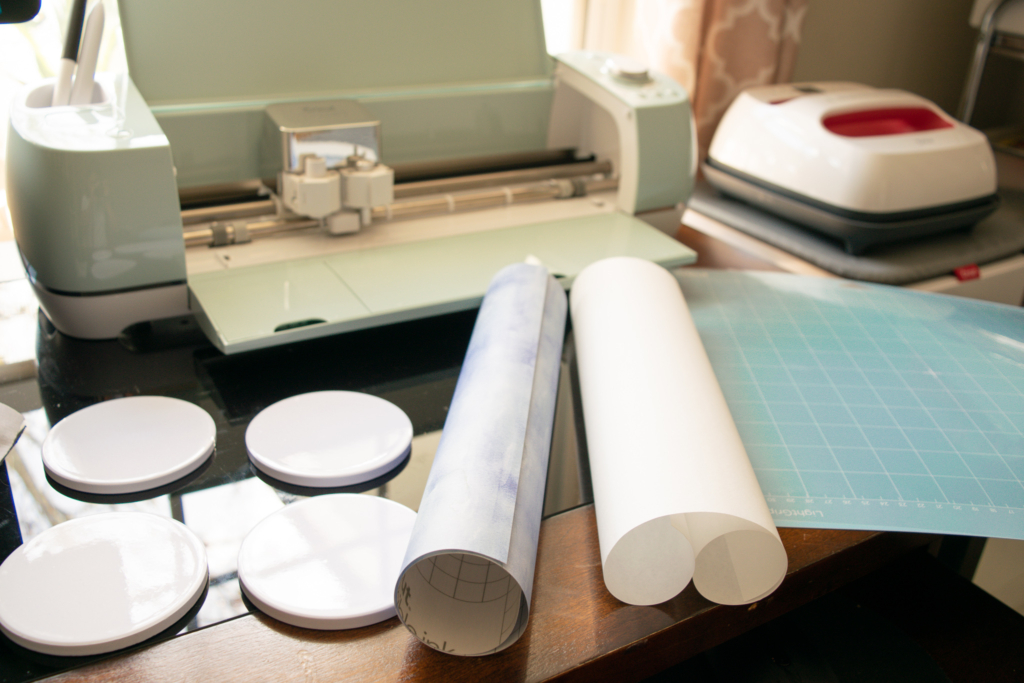
Items Needed:
- Circut Explore Air 2
- Standard Mat
- Infusible Ink Transfer Sheets in Watercolor
- Weeding Tool
- EasyPress 2
- Cricut Round Coaster Blanks
- EasyPress Mat
- Butcher paper (comes inside the infusible ink box)
- White cardstock
- Heat Resistant Tape (Optional)
Step by Step Process in Design Space
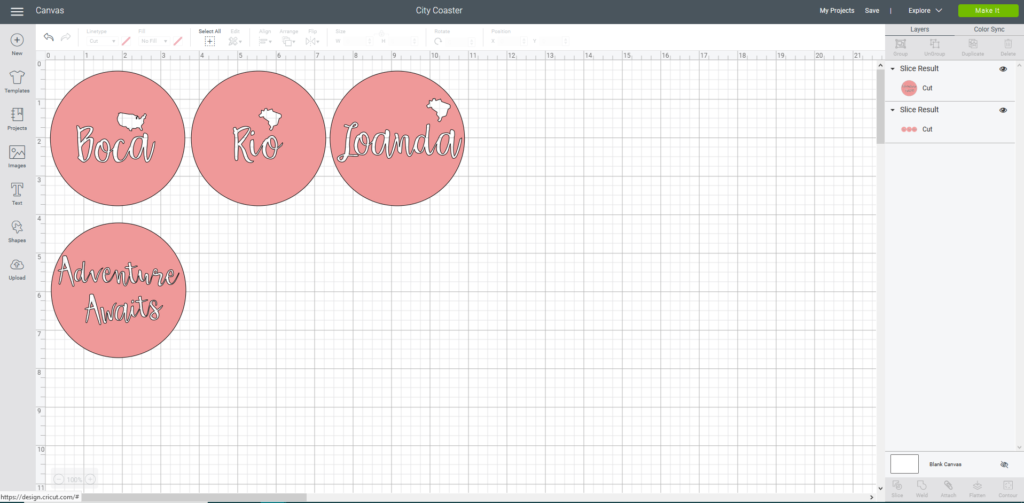


Once your design is cut in the Infusible Ink Transfer sheets, you’ll then weed and cut into circles. (You may use heat resistant tape here to hold down your project but I didn’t have any.)
Also, when weeding, be careful to not lose any small parts of the letters. Hold down with the weeding tool if needed.
Once ready, you’ll then use your EasyPress 2 machine to transfer your image to the coasters. Clean the surface of your coasters prior to applying your transfer sheet.
I was still able to carefully place all circles without the tape.
Now you’ll work on your EasyPress 2 and carefully follow the instructions. It’s pretty straight forward.

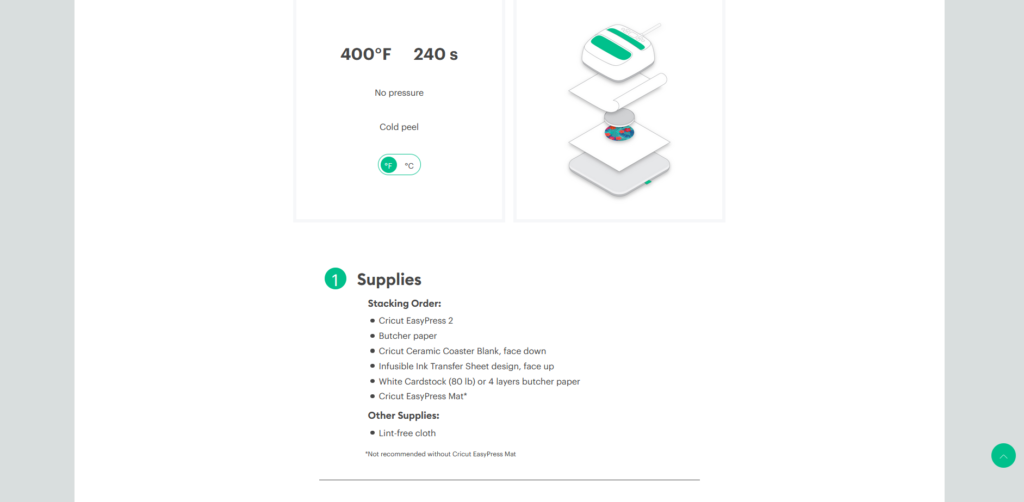
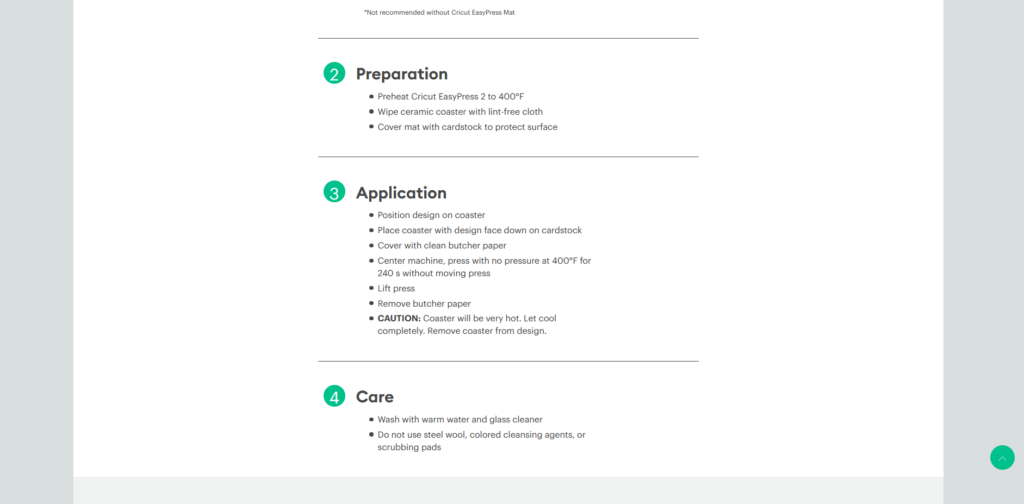
With all the layers carefully in their spots, place the EasyPress on top and wait until complete.
Once the timer is up, remove the EasyPress 2 and place in its dock.
Do not touch the ceramic coasters as they will be incredibly hot. I recommend waiting a good 30 minutes prior to the big reveal.
My coasters came out exactly as I imagined them! I was so proud to be able to create a meaningful and beautiful project that will be used in our home for many years.
I hope you found this DIY Cricut Explore Air custom coaster tutorial helpful. Be sure to comment if you have any questions.
What other projects do you think I should try with my Cricut machines?
Thank you for stopping in!
Facebook | Instagram |Twitter | Pinterest
Stay in the Know! Sign up for my Newsletter below